Step 1. Register in the Beeping Software
Once you decide to start working with Beeping, we will follow this process together:
- You will receive an email to sign the service contract.
- Once both parties have signed the contract, you will receive an email to establish your user credentials on the Beeping platform.
- Once you have established your credentials, you will be able to log in to the Beeping platform and follow Step 2. Connect your store.
Step 2. Connect your store
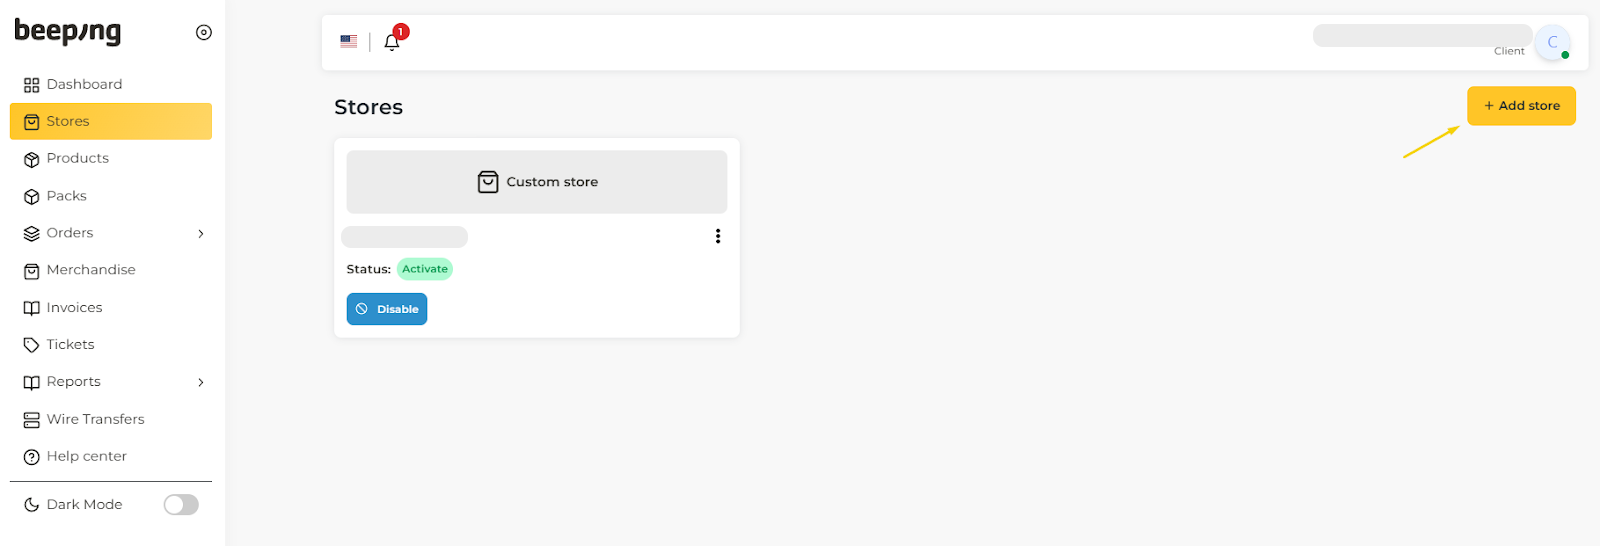
In the Store’s section, click on the Add Store button.
.png)
A window will open and you will be displayed by the Shopify or Woocommerce options. You will need to select the platform corresponding to your store. In the case of a Shopify shop, click on the Shopify option in the pop-up window, and click Next.

Click on Application Installation.
Your Shopify store will open to confirm the installation of the app. Click on Install.
The shop panel will open again, and the shop we have just registered will appear again
Now you have your store connected. Now let's activate it. For this we need the store to have at least one order (you can create it yourself). Follow the next steps to activate it:
Activate > Put the name of your store in "custom name" > "Enable fulfillment" ON > Configure the order approval > Continue > Select the default payment of the store > Add the payment gateway label in the corresponding payment method > Continue > Select from which order you want to import > Import
Most common tags to ad on "Paid orders" box:
-
Shopify_payments
-
Shopify payments
-
Paypal
-
Paypal express checkout
Do not add any tag on the “Bank transfer” box (unless you use it).
Most common tag to ad on "Cash on Delivery" box:
-
Cash on Delivery (COD)

Import orders:
- Import from order:
In this step, select from the order you want to import from your online shop to Beeping. You must have at least one order. If your shop is new, create a manual order from your Shopify shop.
Once we configure these options, our shop will finally be activated. You can see how to do it in this article: How to set up payment methods.
Step 3. Link your products
If you want to sell a product in several stores, you will only have to create it once and link it to the different stores where you want to sell it.
Step 4. Create and link your packs
Packs are used when you have product variants within Shopify. Ex: you will create a 2 unit pack of the "Car antenna" in Beeping and link it to the 2 unit variant in Shopify.
If you have upsell in apps like Easy Sell or Releasit COD, the software will automatically detect it. Ex: you have quantity offers of 1, 2 and 3 units in the COD form. You need to link the product "Car antenna" to the unit product in Shopify. When someone buys one of the quantity offers, Beeping will automatically detect the units that compose it.
Step 5. Ordering
- Tutorial video Troubleshoot error "There are unlinked items"
- Video tutorial Edit and confirm orders
- Video tutorial Edit orders pt. 2
- Tutorial video Cancel orders
- Tutorial video Order summary and data + add users
- Video tutorial Order columns and filters
Step 6. Metrics panel
Follow the steps in this article.
Step 7. Incidents inside Beeping
Follow the steps in this article.
Step 8. Correos Express Incidents (CEX)
Follow the steps in this article.
Step 9. Help Center
Beeping Dropshipping Help Center.
Step 10. Payments and Billing
Follow the steps in this article.
At Beeping we do daily payments. You can request balance withdrawals from your balance to your bank account every day. Please note that from the time your order is delivered to the customer until the refund is reflected in your balance, it may take 24 to 48 hours.
The cash flow for your COD orders is the following:
- The customer pays the courier when receiving the COD order.
- The courier pays Beeping.
- The day after receiving the order refund by the courier, Beeping uploads it to your wallet.
All details of refunds paid by the courier are uploaded to the wallet under “Order Payment”.
If you want to know the status of your refund, you can check this information in the wallet section of the Beeping app.
Here's how we manage payments and invoices in the wallet on a weekly basis:
- Daily payments. Beeping will upload to the wallet the refunds paid by the courier every day (as long as the courier has made refunds the previous day). Note: on holidays, the courier does not make refunds, so Beeping will not be able to upload them to the wallet the next day as stated.
- Daily balance withdrawals. You can request a daily withdrawal.
- On Fridays an advance invoice is issued which includes: weekly shipping estimate €3.80 + handling estimate €1.50.
On the other hand, at the beginning of each month we issue the total invoice for the month. This shows the actual total costs of shipping and handling for that month. The monthly invoice amount will be reduced by the advances paid during the month. Why? Because at the beginning of the month, CEX issues Beeping the total sum and cost of all shipments and returns for each customer. That's why we charge you a weekly shipping estimate.
During the last days of the month it is likely that we will not pay settlements, since part of that money will be used to pay the monthly bill.
We will do our best to avoid any inconvenience, but if we cannot avoid it, it is important for you to know that you can make a claim. We will do our best to solve any difficulties that have arisen.